I have a HP 1662C Logic Analyser, which I've upgraded with a network upgrade (Option 015).
The capabilities this adds is a fun little set of options to control the analyser:
- "HP-IB"-ish control via "Pseudo-telnet" (raw TCP socket on port 5025)
- FTP - for files (/data) and management (/control)
- NFS - same as FTP, two exports (/data and /control)
- X11 - connects to an XServer (computer) and draw's the Analyser's UI in a window (!!)
I've also replaced the ageing old hard drive with a CF card and CF->IDE adaptor, so it's nice and quick now.
I have a raw HDD image available (for the 1660C series only) if needed, although I couldn't tell you if it was V2.xx or a previous version.
The disk drive is mountable, but it's byte-swapped FAT [1].
Upgrading a non LAN model
In short, you need the following parts to perform the upgrade, if your unit does not have it:
- 01660-66516 Board Assembly - I/O (required with LAN option)
- Replaces 01660-66515
- If you're capable of soldering, you could solder in the connector per jamiecraig's guide
- 1818-5624 1024K x 32 SIMM
- Replaces 1818-5625
- This is just an 8MB 72 pin SIMM - a generic one should probably work.
- Firmware package 166XC-CS-VA-02-01-OS-SYS.zip
If you need details on how to open the system, refer to the service manual . Have some torx screwdrivers or bits ready!
Once the new parts are installed, go into the System menu and select Update Flash. It will ask for SYSTEM.LAN to be provided on a floppy. Extract the update file and copy the contents of Disk1 to a floppy, and proceed.
Once the device has rebooted, you should now see the LAN Settings button in the System menu.

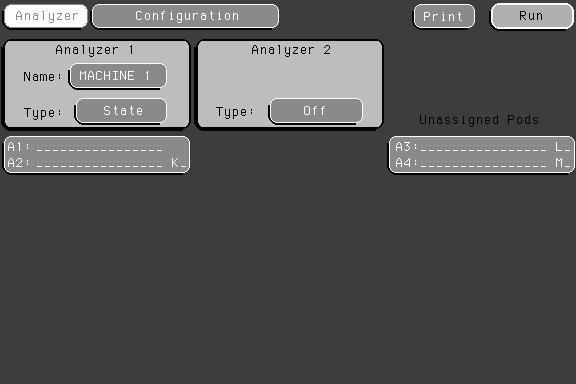
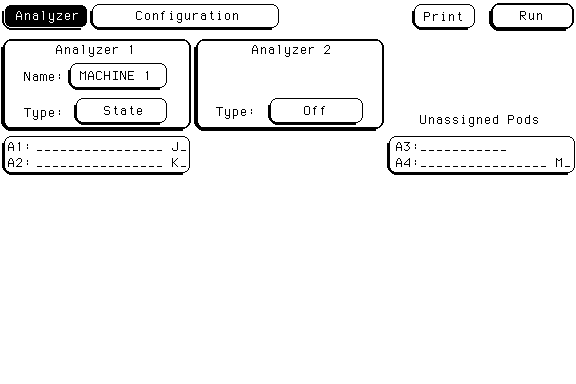
Logic Analyser Config
Once your machine is now LAN capable, you'll need to get it on the network.
The OS on the Logic Analyser does not have a DHCP client, so you'll need to assign / allocate a specific address on your network, and then manually input that to the device.
- Go to the System Menu
- Open the LAN Settings page
- Set your settings as follows:
- Lan Port: LAN TP
- This is selecting between the twisted pair (LAN TP) 8P8C connector and the BNC (LAN BNC) connector.
- Helpful hint: Don't click or select this button while connected remotely, as the setting applies immediately!
- Analyzer IP Address: (e.g.) 192.168.1.2
- This is the IP address you're going to give the device.
- NOTE: There is seemingly no way to set the subnet mask. I think it's set based on the "class" of the IP address. You can see the "assumed" subnet mask in the Ethernet Statistics page.
- Gateway IP Address: (e.g.) 192.168.1.1
- This is the router that the device will use to speak to other networks. This is particularly important if you expect to access the device from a different subnet (read the note in the previous point!)
- File Timeout: 5.1s
- I have this set to 5.1 seconds, unsure exactly what this impacts at this stage. Leave this default.
- Analyzer name: HP1660C
- Set this as you wish - I think this just sets it on the X11 window title and perhaps a few less important locations.
- Lan Port: LAN TP
- The device should be pingable if you've connected it and addressed it correctly.

Logic Analyser Use
Psuedo-telnet
This allows you to issue commands to the Logic Analyser, such as connecting to an XServer, set up the capture system etc.
This is also known as the "command parser socket" in the "LAN User's Guide".
Note: Having this connection open will take up the one allowed connection to the control folder / user in NFS / FTP:
Command:      USER control
Response:     530 /CONTROL: Already mounted or no more mounts available
Error:        Could not connect to server
Computer Prep
- Have a telnet or nc (netcat) binary available
Use
Open a connection
- telnet 192.168.1.2 5025
Issue commands by typing into the session
- :menu?
- xwin on,"10.1.10.176:0.0"
telnet 10.1.10.216 5025
Trying 10.1.10.216...
Connected to 10.1.10.216.
Escape character is '^]'.
:menu?
0,0
^]
telnet> quit
Connection closed.
Refer to the LAN User's guide and the Programmer's guide .
FTP
Computer Prep
- An FTP client (e.g. FileZilla, command line variants)
- A firewall that is disabled, or allows a client connection to an active mode server
- The Logic Analyser does not support PASV (passive) mode, so in order to return data to the client, the client (your computer) opens a random port and asks the server (the Logic Analyser) to connect to it [2]. Since the server is (from the OS / firewall's perspective) making an unsolicited connection to a random port on the computer, the message gets dropped or rejected. You can either just turn the whole firewall off, or allow anything from port 20 inbound to the unprivileged (1024 to 65535) ports.
If you are able to connect to the Logic Analyser, but unable to list the directory (see below), you will need to check for firewalls between your FTP client and the Logic Analyser:
Status:       Retrieving directory listing of "/"...
Command:      PASV
Response:     502 PASV command not implemented.
Command:      PORT a,b,c,d,x,y
Response:     200 PORT command ok.
Command:      LIST
Response:     150 Opening data connection for  (a.b.c.d,((x << 8) + y)).
Response:     550 : no such file or directory
Error:        Failed to retrieve directory listing
It will look like this on the firewall:

Note that this will also be made more difficult if there is NAT between the two devices.
Use
To connect to the analyser:
- Host: IP address or DNS hostname (manually set up) of the device
- Port: 21
- User: control (one connection only) or data
- Password: <blank>
- Maximum connections: 1
- Transfer Mode: Active Mode
- All other options can probably be left default, make sure to allow insecure FTP (i.e. don't require it).
NFS
NFSv2 is unsupported by RHEL 8 onwards [3], Ubuntu 20.10+, and Debian 11+ due to a default setting in the Linux kernel config changing [4].
Computer Prep
Run a distribution of Linux with the kernel build option CONFIG_NFS_DISABLE_UDP_SUPPORT unset.
grep -rni CONFIG_NFS_DISABLE_UDP_SUPPORT /boot/config*
Bad
/boot/config-5.10.0-21-amd64:8881:CONFIG_NFS_DISABLE_UDP_SUPPORT=y
Good
/boot/config-6.1.12-custom:6006:# CONFIG_NFS_DISABLE_UDP_SUPPORT is not set
Use
Mount the device on your computer:
sudo mount -t nfs -o vers=2 10.1.10.216:/ control or data /mnt
File system
slot_a
This folder looks to contain the captured / analysed data. slot_a refers to the Logic Analyser "card" (it's more of a backplane). If you had a 166xCS (Logic + 2ch Oscilloscope) or a 166xCP (Logic + Pattern Generator) slot_b would refer to that extra card. Similarly, I presume if you had a 165xx "Mainframe" analyser this would refer to actual slots.
Each "machine" you have configured on the analyser is visible in here, and there looks to be some virtual files for various parts of the data. Here you can see my "machine1" and each of the labels I have applied to the various busses / signals for my Z80 systems.
/slot_a/
  data.asc/
    machine1/
      1st_line.txt
      addr.txt
      data.txt
      iorq.txt
      line_num.txt
      mreq.txt
      rd.txt
      wr.txt
status
This folder contains information about the system.
/status/
  frame.txt
  mount.txt
  system.txt
frame.txt
Shows information about the hardware configuration of the system. Again, probably more useful for the 16500 systems.
Analyzer name: HP1662C

Slot      Module Name          Code Version  Card ID Code
======    ===========          ============  ============
CPU       System               V02.00
slot_a    Analyzer             V02.01        032
mount.txt
Shows active connections.
Analyzer name: HP1662C

Hostname                         UID     GID      Directory
========                         ======  ======   =========
FTP:(A.B.C.D,X)                   00000   00000   /data
system.txt
Shows analyser's current status.
Analyzer name: HP1662C


Execution Status:
  slot_a - stopped
system
This folder contains the hard disk, floppy disk file systems, virtual files to allow taking screenshots, setup.raw containing the current config, and the program file which allows sending a command list to the system.
/system/
  disk/
    flexible/
      < Floppy contents >
    hard/
      < Hard Disk contents >
      configs/
      demo/
      system/
  graphics/
    screen.pcx
    screen.tif
    screenbw.epi
    screenbw.tif
  program
  setup.raw
graphics
Pretty self explanatory - if you download these files, you get a screenshot of the display. screen.* is in greyscale, and screenbw.* is in black and white. Surprisingly there is no colour screenshot here.
screen.pcx:   PCX ver. 3.0 image data bounding box [0, 0] - [575, 377], 8-bit colour, 88 x 80 dpi, RLE compressed
screen.tif:   TIFF image data, little-endian, direntries=14, height=384, bps=8, compression=none, PhotometricIntepretation=RGB Palette, width=576
screenbw.epi: PostScript document text conforming DSC level 3.0, type EPS
screenbw.tif: TIFF image data, big-endian, direntries=16
|
|
program
This is the equivalent to the "command parser socket" (tcp/5025). You can write into this via NFS or overwrite the file using FTP to send commands to the device. Scroll back up to the telnet section to get an idea of how to use this.
setup.raw
This is the "current" configuration of the device. Download this to save the "state" of the device, and then naturally write a previous version of the file to restore the config.
X11
Computer Prep
This is the involved section.
You need an Xorg based display stack - It looks like there was some work to add support to Xwayland, but it stalled [5]. I'm using XFCE on Debian 11, and that's using LightDM.
Configure LightDM to run an X server in network mode: sudo nano /usr/share/lightdm/lightdm.conf.d/50-xserver-command.conf
[Seat:*]
xserver-allow-tcp=true
Install the HP 16500 fonts into the system [6]:
Copy the lg165.bdf and sm165.bdf files from the Firmware image, or from the system
Convert them to PCF:
- bdftopcf lg165.bdf > lg165.pcf
- bdftopcf sm165.bdf > sm165.pcf
Convert them to PCF.GZ: gzip *.pcf
Make a font folder: sudo mkdir /usr/share/fonts/hp16500b
Copy the gzipped fonts: sudo cp *165.pcf.gz /usr/share/fonts/hp16500b
Re-generate the Font cache: sudo fc-cache -rv
Make them available to Xorg: cd /usr/share/fonts/hp16500b; sudo mkfontdir
Configure Xorg to use the folder: sudo nano /etc/X11/xorg.conf.d/fonts.conf
Section "Files"
    FontPath "/usr/share/fonts/hp16500b"
EndSection
Restart Xorg, so either sudo reboot or sudo systemctl restart lightdm, and log back in
Allow connections from the Logic Analyser: xhost +192.168.1.2
- This step will need to be done each time you start Xorg again.
Use
Grab the Xorg display details from your computer's running session: echo $DISPLAY
Start connection through front panel
- Open the System menu
- Open the X settings menu
- Set your "server" (computer)'s IP and DISPLAY session details:
- Select Done
- Select the X Connect button

Start connection through "control" session
Either through the /system/program file or through telnet, issue the connection command:
xwin on,"10.1.10.176:0.0"
This is:
xwin on,"$IP_ADDRESS:$DISPLAY"
Connected!
Now you have remote mouse and keyboard control over your logic analyser!
Now, it's worth quickly testing something, because if you've installed the fonts incorrectly, the device will just straight up crash. It does say WARNING: 16500 fonts not loaded on "<COMPUTER>". or something similar when you connect initially, but it's quite easy to miss.
Font Test
To perform the font test, we just need to bring up the manual numeric / alphabetic keyboard. The easiest way to do this:
- Start the X11 connection
- Open the System menu
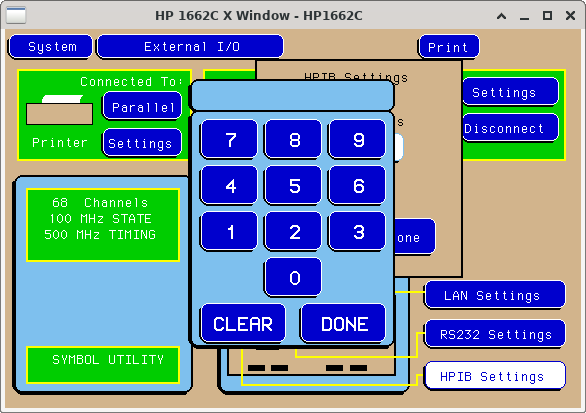
- Open the HPIB settings page
- Mouse click on the HP-IB Address field.
- If you see the below, you've installed the fonts correctly:
- If not, you've just crashed the Logic Analyser and it'll need a hard-reboot through the power switch on the front.
References / Further reading
- HP16500B Experiences - Contains instructions to format a replacement hard drive, mount the disk image, setup the "inverse Assembler", and using an X server on Windows.
- My collection of various files relating to the HP 1660C series
- HP's Product page
- Jamie Craig's HP1661CS Ethernet Interface
- philpe.me.uk - HP16500B
- Barbouri - Fixing Up a Hewlett Packard 1662C Logic Analyzer
- zw-ix - Replace the hard disk with a CF card in a HP 1660ES Logic Analyzer
- The Resistor Network - A Testament to X11 Backwards Compatibility
- EEVBlog forum - HP 1661C logic analyzer setup help
- EEVBlog forum - Older logic analyzer question
- EEVBlog forum - HP Logic Analyzer Inverse Assemblers
- pcbjunkie - HP / Agilent Logic Analyzer Adapters
- paulcarbone - HP 16500B Logic Analyzer
- stonemarmot - otek Floppy Drive Emulator In HP Logic Analyzer
| [1] | https://sites.google.com/site/hp16500/harddisk?authuser=0 |
| [2] | https://winscp.net/eng/docs/ftp_modes#active |
| [3] | https://access.redhat.com/documentation/en-us/red_hat_enterprise_linux/8/html/managing_file_systems/mounting-nfs-shares_managing-file-systems#supported-nfs-versions_mounting-nfs-shares |
| [4] | https://bugs.launchpad.net/ubuntu/+source/nfs-utils/+bug/1973101 |
| [5] | https://gitlab.freedesktop.org/ofourdan/xserver/-/commits/xwayland-listen-protocol |
| [6] | https://www.philpem.me.uk/elec/testgear/hp16500b/rc |