The EPSON HX-20 sold with an optional add-on, a dual Floppy unit, that turns out to need it's own boot disk. I don't have one, so let's make one using the disks in the unit and a bog standard 486 PC.
Intro
The EPSON HX-20 was what most consider to be the first "Lap-top" computer. It ran a funky dual CPU setup at sub-megahertz speeds, included a printer and a tape drive, and reasonable IO, while remaining portable and usable away from the desk. However, this did not match the functionality of most computers at the time, so an external Floppy drive, the TF-20 was sold as an accessory.
The TF-20 was (initially) just two quarter-height 5.25" 360K DD / DS Floppy drives in a case with a power supply, but it was modified to work with the HX-20 via serial. This required a CPU, and IO, which in turn required ROM and RAM.
The TF-20 with the HX-20 communication add-on ends up being a Z80 system running at 4 (?) MHz, and boots itself off the startup disk that is shipped with the system.
Unfortunately, I did not receive that disk with my TF-20, so it sat, un-used, in storage. We can't just use a "normal" PC 1.2 MB drive to write these disks, as they are the 360K type, which has less and wider cylinders / tracks.
Thanks to an Adrian's Digital Basement video [1] I had been informed that almost all FDDs use the same interface - including PC FDDs. This meant, than in combination with the image of the disk on vintagecomputer.net [2] that I should be able to use the TF-20's own drive to make the disk in a PC, without any other hardware!
Ingredients
- 1x TF-20 (we don't need the HX-20 communications add-on card to make the disk, but to test it we will)
- 1x 5.25" DS, DD (360K when using IBM formatting) floppy
- 1x PC with a standard 3.5" / 5.25" FDD connector, and a BIOS that can support 360K disks (?)
- 1x 5.25" FDD cable to connect to the above computer motherboard
- MS-DOS, or compatible, on the computer
- IMD floppy imaging tool (to run under DOS) [5]
- HX20BOOT.IMD from vintagecomputer.net [2]
Steps
- Carefully disassemble the TF-20 to remove one of the floppy drives - the RHS unit (B) is recommended as it already has the resistors for the pull-ups installed on it.
- Remove the four screws on either sides of the unit
- Pull the top cover off (pull upwards)
- Remove the bottom cover (pull downwards)
- Remove the screws in the top and bottom of the floppy drive
- Disconnect the cables from the drive - slide the drive a bit forward if it makes it easier
- Free the drive from the main unit by sliding it towards the front.
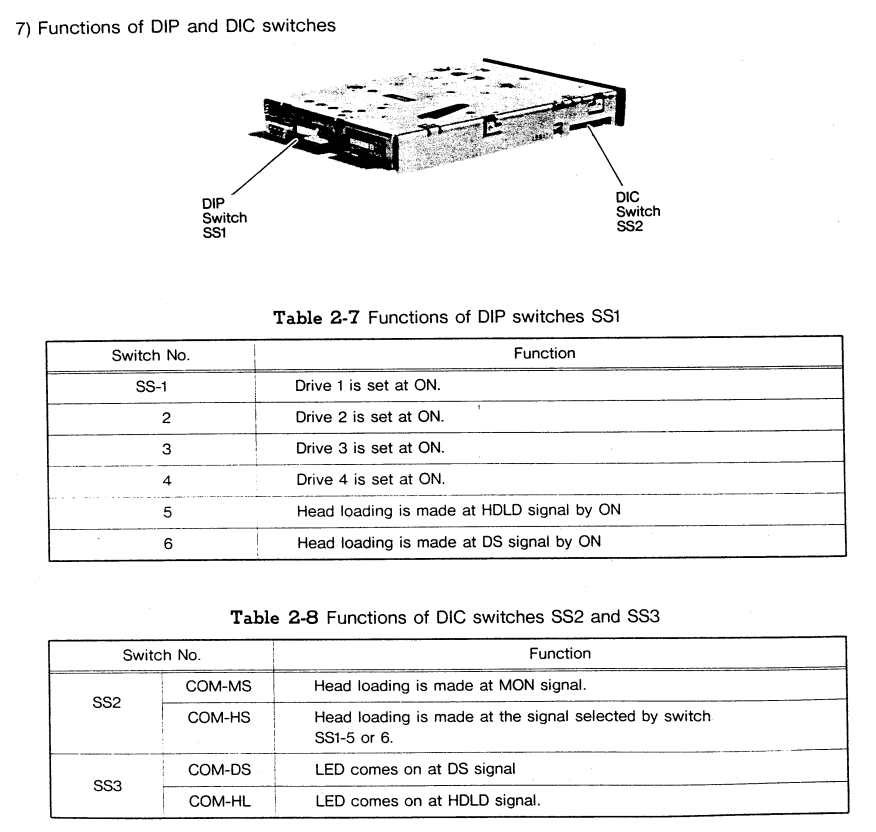
- Adjust the jumpers on the rear of the drive to 010001 (second drive, Head Load on Drive select)
- Connect it to the computer - usually the 5.25" connector is the second drive, but double check - if it's between the twist and the motherboard, it's good.
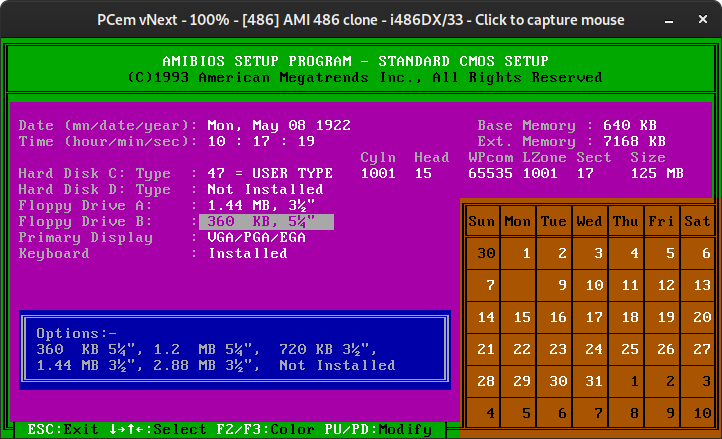
- Set your BIOS to match - second drive is 360K 5.25"
- Boot DOS
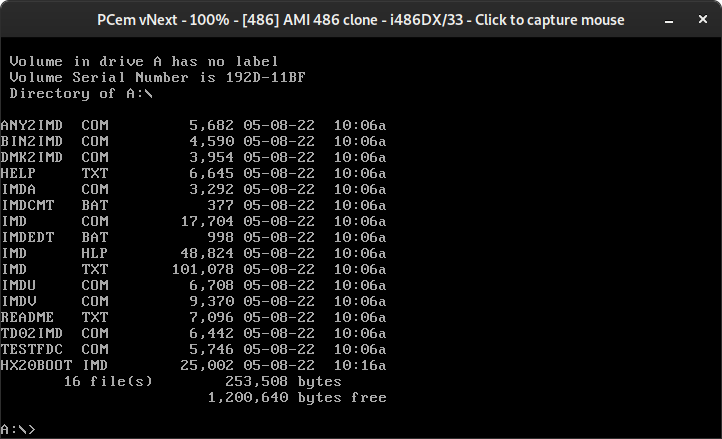
- Copy the IMD tool, and HX20BOOT.IMD to the computer (probably via the other floppy)
- I've done it like this:

- I've done it like this:
- Insert a 5.25" Double Density, Double Sided disk into the HX-20 drive
- Run IMD to write the image to the disk
- A: to change to the first floppy
- dir to confirm that IMD and HX20BOOT.IMD are on the disk
- imd to start IMD
- Read the instructions if you want
- ESC to exit the guide
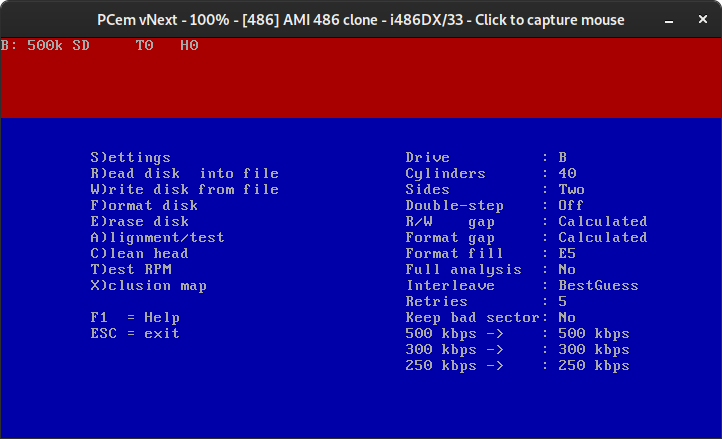
- S to configure IMD
- Drive = B
- Cylinders = 40
- To format the disk and verify that IMD and the drive is working, we need to set some values that IMD will use just while we format the disk. IMD will usually pull these settings from the IMD file.
- Sides = Two
- Double-Step = Off
- Interleave = 1
- ESC
- F to format
- Enter 16 Sectors/Track? when prompted
- Accept the suggested data rate/type (250 kbps MFM for me)
- Set 256 Sector size
- This should run through without reporting errors, if the drive is working
- Return to the main menu
- Out of an abundance of caution, reset Interleave back to As read or BuestGuess
- W to write a disk
- Select the HX20BOOT file on A:
- At this point the emulator (PCem) seemed to break down, so you'll need to play it by ear
- Once IMD is finished writing the disk and the activity light stops, it's safe to remove the disk.
- Remove the disk, and re-assemble everything.
- The DIP switches will need to be restored back to default, which is 010010 for the second drive)
Verification
Once you've made the disk, the TF-20 should emit a particular pattern of disk accesses on a "successful" boot. You can see this on a video over on the vintagecomputer.net site again [3]. It's roughly described as one "long" access (~500ms), one "short" (~200ms) and then another long, before going idle. Each access causes a click of the head loading, and the light comes on for the duration.
At that point, you should be good to hook it up to your HX-20.
Theory
As described in Adrian's video, most FDDs use a "Shugart-Style" interface, as they were the the primary company involved in the design of the drives. Any units that weren't sold as part of a highly-integrated unit (for example, Commodore 64 FDDs) would likely be using off-the-shelf units, in the same way the PC did. We can confirm this with the TF-20 Service manual, which is available online, that shows the pin-out is basically the same as the "standard".
The PC actually uses a non-standard "trick" - the Shugart interface has four drive-select lines, allowing you to run four drives. Normally, jumpers on the FDD itself selects which select line the drive listens to. These select lines are arranged in such a way that allows you to swap / invert pins 10,12,14,16 around, which then swaps which signal the drive is seeing. The IBM PC used this to remove the need to set jumpers on the drives. You can see a more detailed explanation of this here: [4]. The downside is that now there's only a way to distinguish between two drives, rather than all four.
When we connected the EPSON drive to the PC, we connected a "standard" Shugart drive to a PC, as the B: (second) drive. We also set the jumpers on the EPSON drive to identify itself as the second drive. This all "just works" since it's before the twist, and all of the signals are in the right place.
The DIP Switches on the drive that we set configure the drive to behave as the second drive (thus answering the second "Drive-Select" signal) and to move the read/write head to the disk (called loading) when the drive has been selected. Most or all PC 5.25" drives load the head when the latch is pressed, so this signal needs to be remapped.

Once the settings are changed on the drive, it becomes indistinguishable from a normal PC 360K drive, and allows us to read / write the disk.
Links
- https://www.youtube.com/playlist?list=PL1I1jZqBlbrtTa2c48Bxjmibe5mdVQOoQ, specifically https://youtu.be/TfEzjcG_0gs
- https://www.vintagecomputer.net/fjkraan/comp/tf20/index.html (HX-20 boot disk image Contains TF-20 boot code and HX-20 Disk Basic extension.)
- https://www.vintagecomputer.net/fjkraan/comp/tf20/index.html (Booting TF-20)
- https://www.bytedelight.com/?p=1418
- http://dunfield.classiccmp.org/img/index.htm (ImageDisk 1.18 IMD Soft-sectored/PC controller - Latest 07MAR12)

